Farm Project: Driveway Gates
Over the past few years, a design emerged for a relatively simple and effective electrified fence gate. Turns out, it works well for the driveway too. Check it out.
Published October 25, 2020 || Updated November 2, 2020
Electric fencing is expensive and challenging to maintain
Only the southern half of our property is electrified. The east (our front yard), west (the back-forty), and northern pastures are not. To safely contain our sheep (and protect them from predators), we have had to be creative by using portable fencing and experimenting with different ways of extending the fence current.
Over the years, we have slowly improved the infrastructure of the farm so that more and more pasture is surrounded and subdivided by semi-permanent electrified fencing. Fencing is expensive. And more fencing, especially subdivided fencing, means more gates.
With all this fencing, our little farm requires over twenty gates. But traditional metal fence gates are also expensive and need robust fence posts to support them. We hate digging post holes. Hate. Therefore, in lieu of metal gates, we came up with a fence gating scheme using electrified rope and two-by-twos. Electrified rope is also expensive when compared to other electrified cord options. But a roll of electrified rope can make a lot of gates which are far cheaper than the equivalent metal gates they replace.
Over time, we have added electrified rope gates throughout the farm. The gates are portable, but we prefer to leave gates in place instead of carrying them from one end of the farm to another. We have maybe eight more gates left to build.
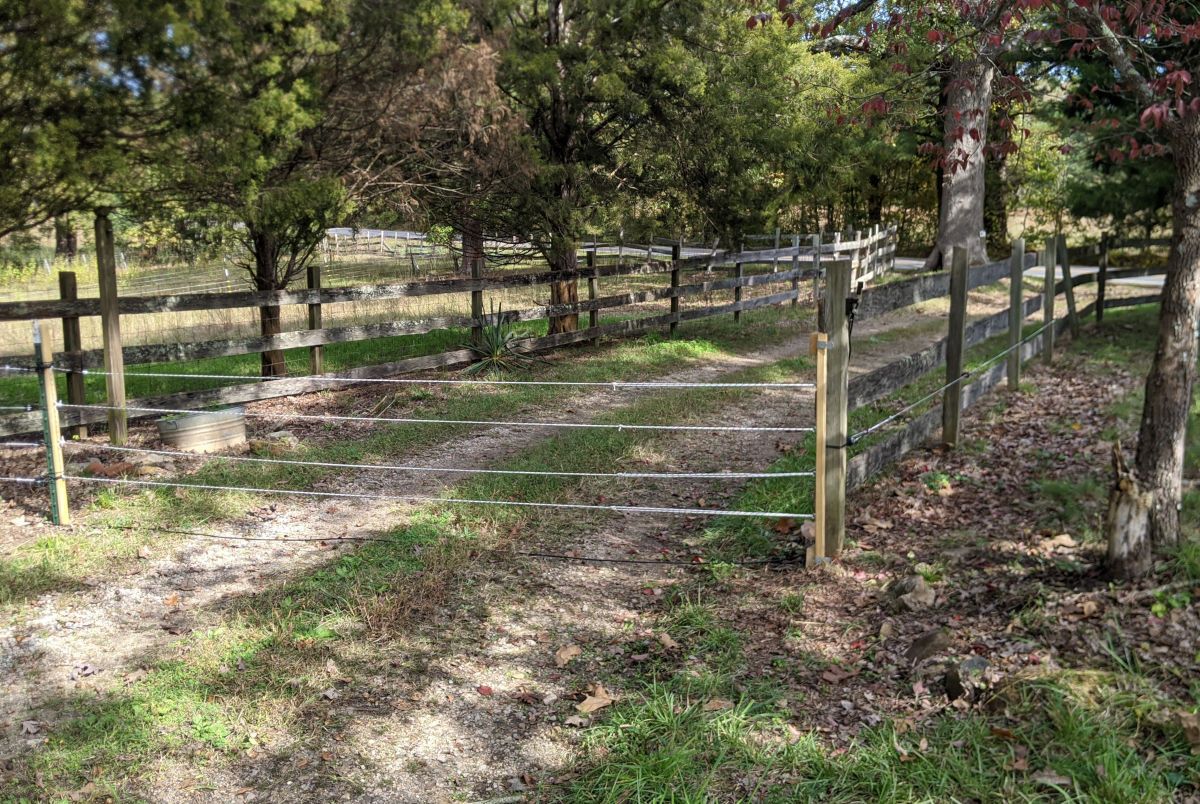
As mentioned previously, we had not yet electrified our front yard (the east pasture). Pretty wood-rail fencing surrounds it, but nothing electrical. When running the sheep through the front yard, we would set up portable electric netting to ensure they didn't leak through the rails. What a pain! Additionally, the driveways were wide open (no gates), so those had to be blocked off as well.
Driveway gates: forever on the to-do list
Adding metal gates to the driveway have been forever on our to-do list (for lots of reason, not just for sheep containment). But again, gates cost money, and we'd have to dig post holes. So we kept putting it off.
Then we thought, Why not just use the same gating system we use for the rest of the farm and electrify the front at the same time? Mind you, the design itself is simple, but there was a problem: opening and shutting a rope gate would not be as simple as unlatching a metal gate and swinging it open.
Or so we thought.
A plan comes together
One day, we had a moment of clarity—an epiphany.
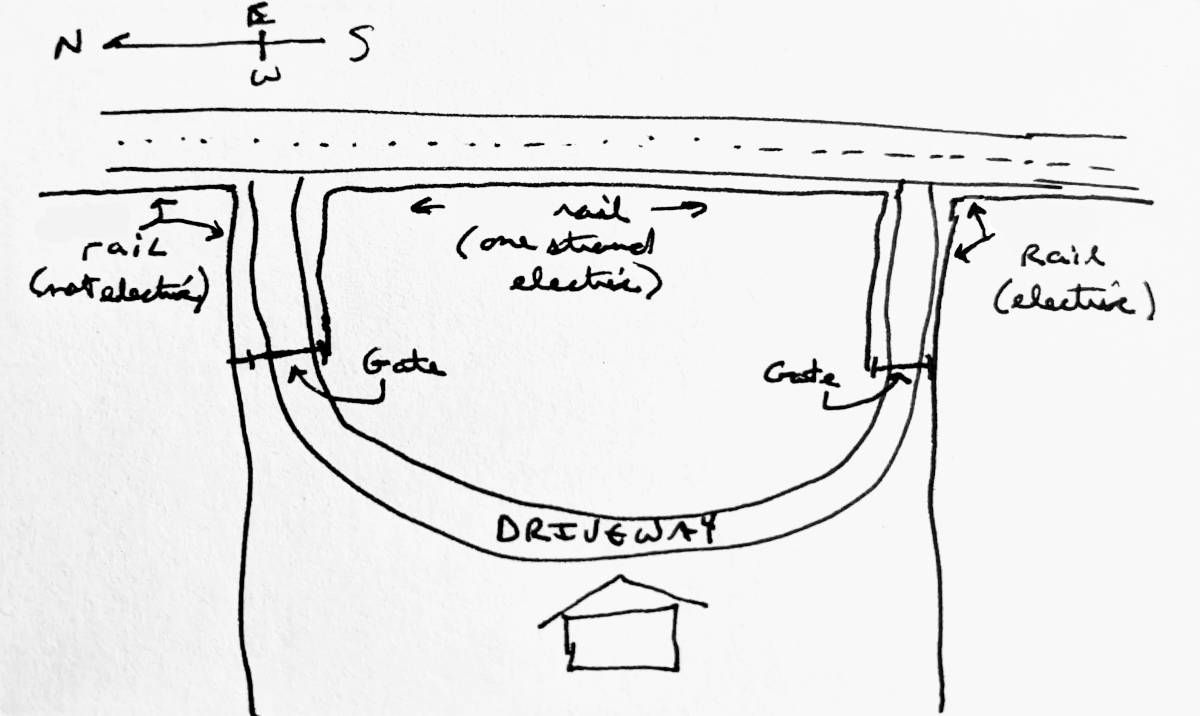
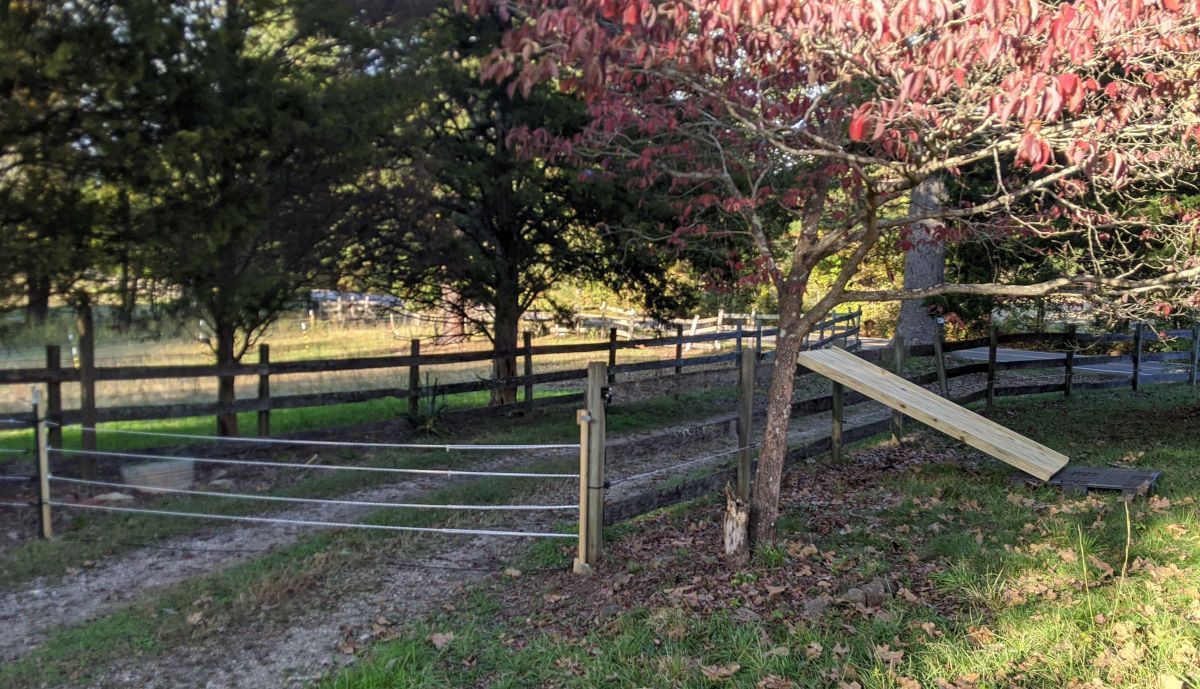
Our driveway is a loop with two exits. The fence-lined front yard is about an acre and lies within the loop. Our house sits on the other side at the top.
First: electrify the front yard
We ran one conductive wire (Gallagher Turbo Wire, which we quite like) between the lowest two wooden rails of the front-yard fence. We used a donut insulator on each end and screw-in insulators at each vertical post. Word of advice: drill a pilot hole for each screw-in insulator. It makes everything go faster with less effort.
Note, we considered putting in a high-tensile wire, but with today's modern poly-wire, heck no! We will slowly be ripping out every inch of high-tensile and replacing it with polywire. Sure, it doesn't last forever, but it is relatively cheap to replace and super SUPER easy to fix and manipulate when compared to high-tensile.
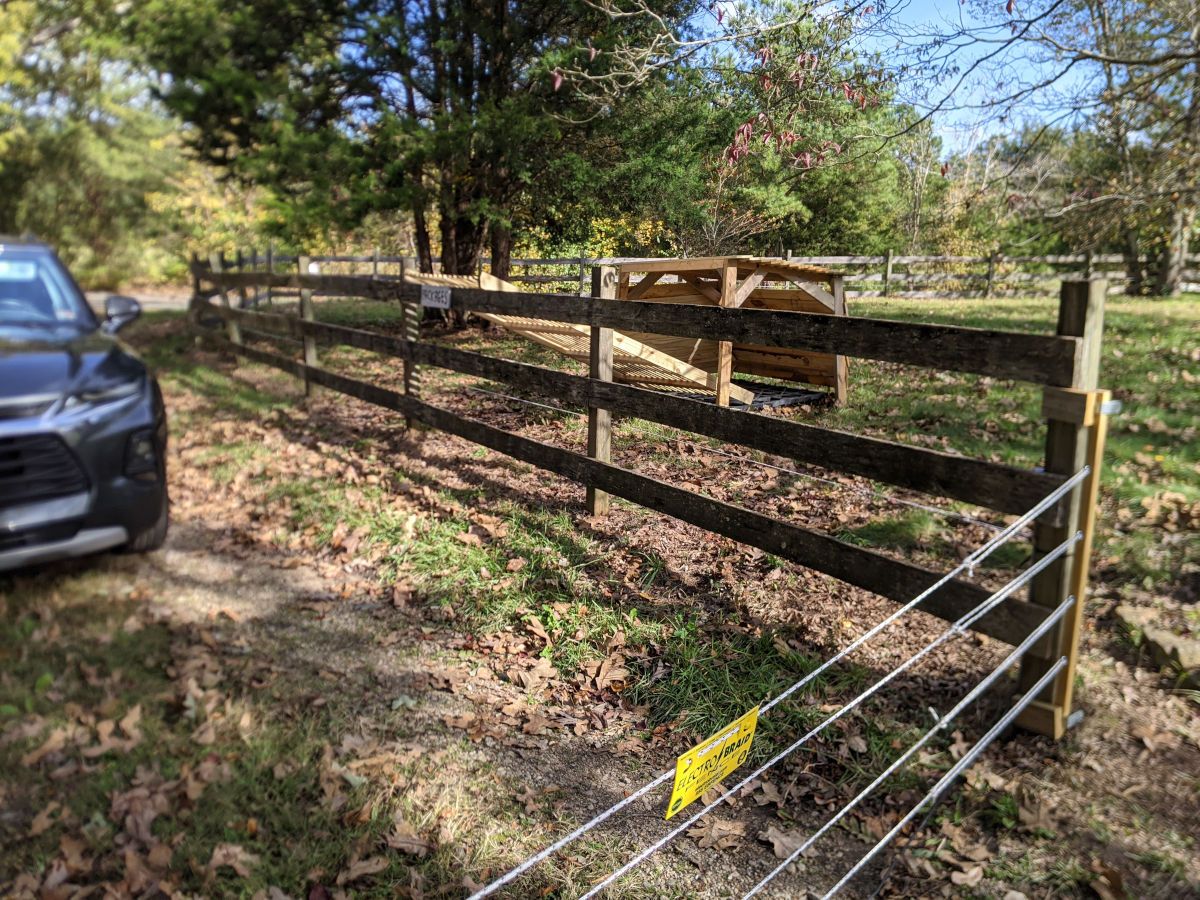
Next, we had to connect the loop to the main fence current. The southern pasture brought electricity along the other side of the driveway. So, we ran a heavy insulated wire from the fence, across the driveway, to the interior yard fence. We fence-stapled the wire to the wooden post and then attached it to the interior fence. We also added a cut-off switch to cut off the current right there at the driveway opening.
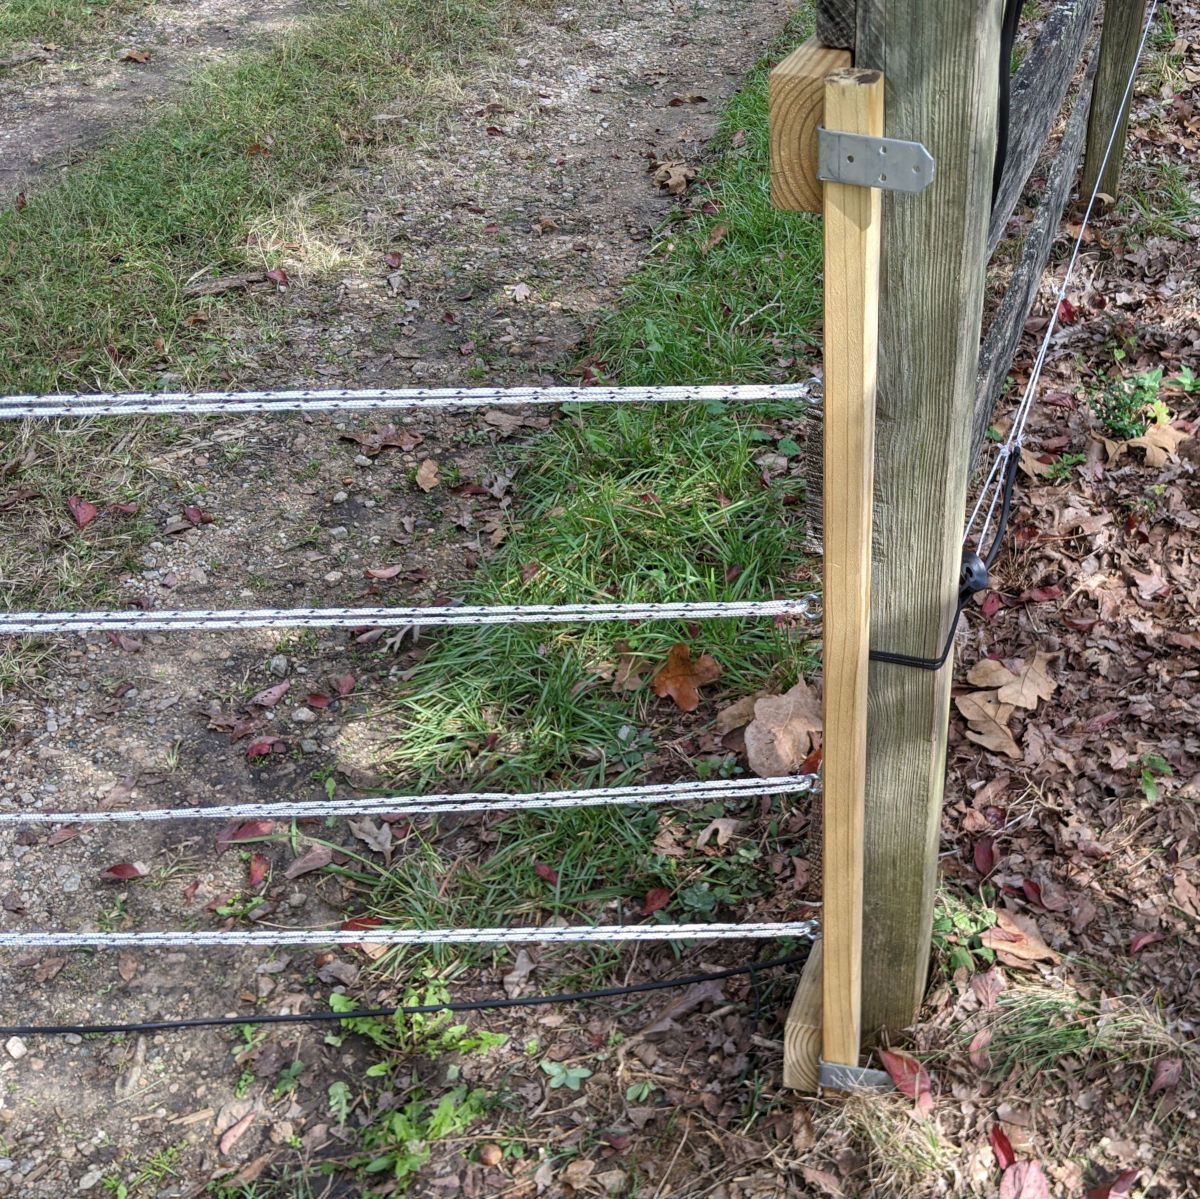
Next: make the gates and connect it to the grid
We then cut three-and-a-half-foot lengths of treated two-by-twos to serve as gate end-posts and inset a screw eye every eight to ten inches (four screw eyes per two-by-two). Using a cord, we temporarily tie each pole to their respective fence connection points and then thread electric rope (four lines) between them to form the gate. (Electric rope: Zareba Electro-Braid—crazy expensive, but is as easy to manipulate as heavy braided rope.)
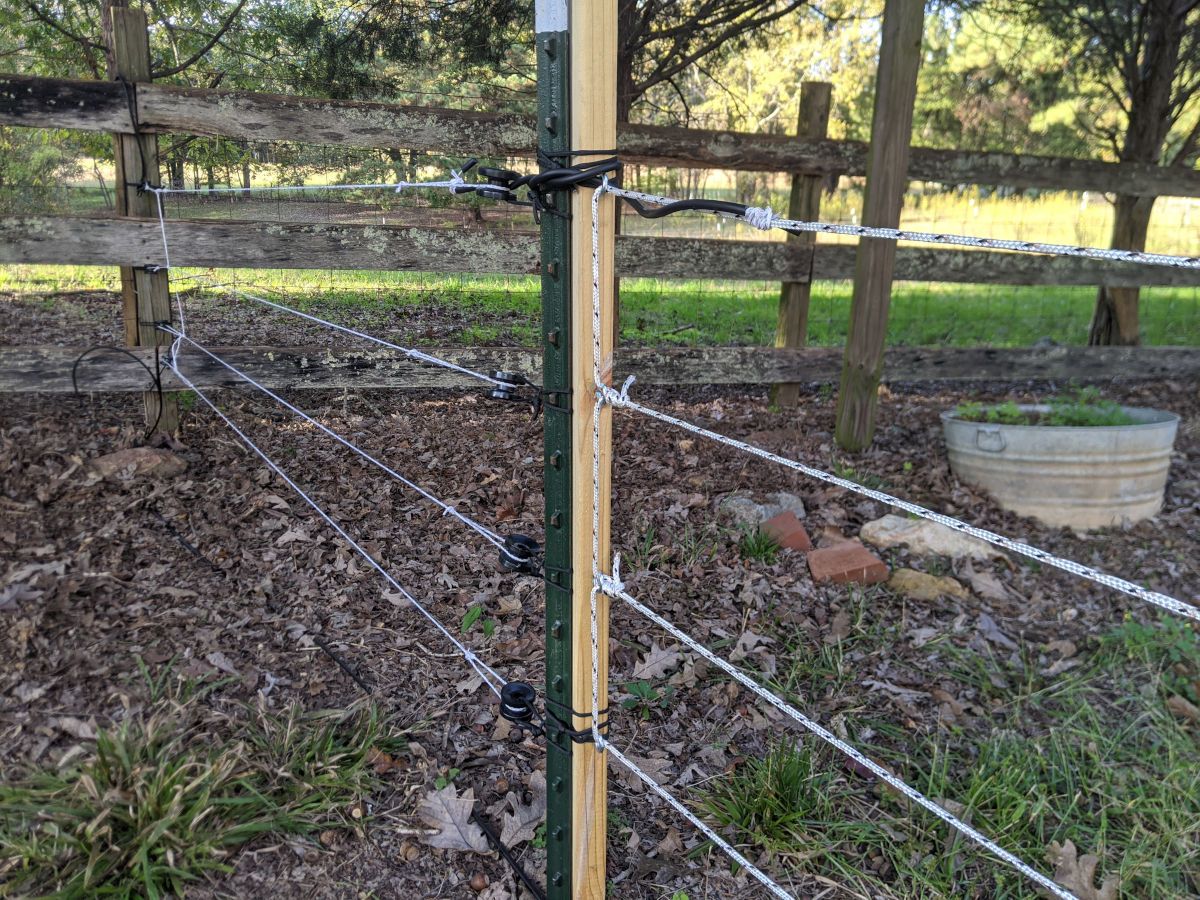
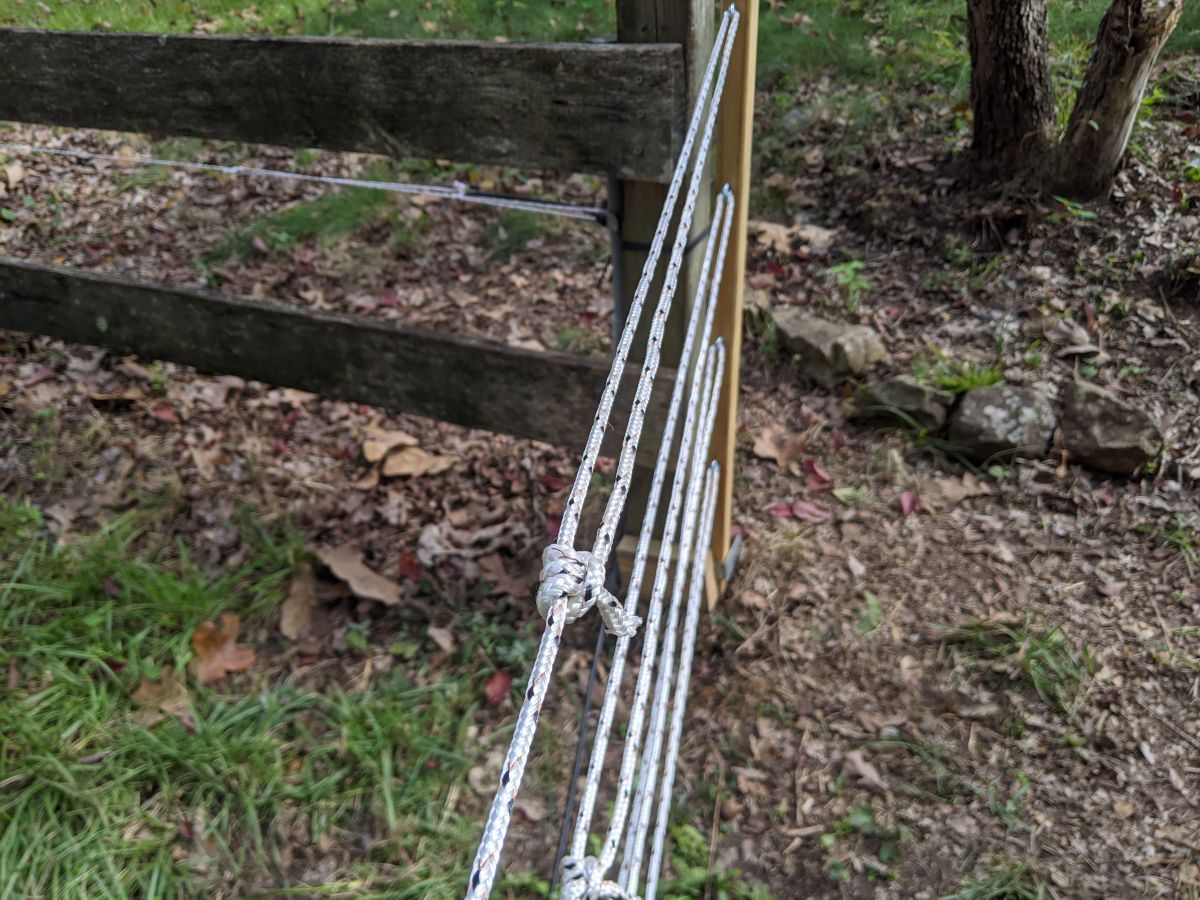
One end is the fixed end, and the other, the side that will open, has adjustable loops (we use a variation of taut-line hitch—arguably the world's most useful knot; learn it!). The four lines are kept taut by adjusting the loops allowing for as much or as little tension as one feels is needed.
We configured the fixed end with each conductive line attached to the line beneath it, laced through the screw eyes. This end of the gate semi-permanently attaches to the fence using 550 cord (also called paracord). Only the fixed end is connected to the hot wire delivering current.
On the side that opens, two hooks (metal angle-brackets) hold the two-by-two in place. The hooks make the process of opening the gate super simple:
- Flip the electrical cut-off switch.
- Loosen the top two ropes by sliding the loops open a few inches.
- Unhook the gate end.
- Move the gate out of the way.

To allow the gate to be left open and keep everything nice and tidy, even if we choose to leave the current on, we added two more hooks on the side-fencing. With the two gate positions available, opening and closing the gate only takes a moment. We dare say it is arguably faster and easier than a traditional fixed gate.

The Womb
We are pretty pleased with the results. And Monica mentioned how it just makes you feel more protected like you are in a womb. We have had the very occasional person drive our driveway loop in the daytime but, more disturbingly, also at night. The sheep are contained, the dogs are far less likely to bust through and wander to parts unknown (and onto the road), and feral animals—in particular, human animals—are relegated to the roadway. Bonus! The solicitations will end, thank God—in particular, "His" salespeople who are most unwelcome and rather creepy.
Tell me about your farm innovations
Please do share with us your own farm innovations. Or even your non-farm innovations and projects. And let me know if you want to try this yourself and need more details. If you do end up making some gates and improving the design, please let me know.
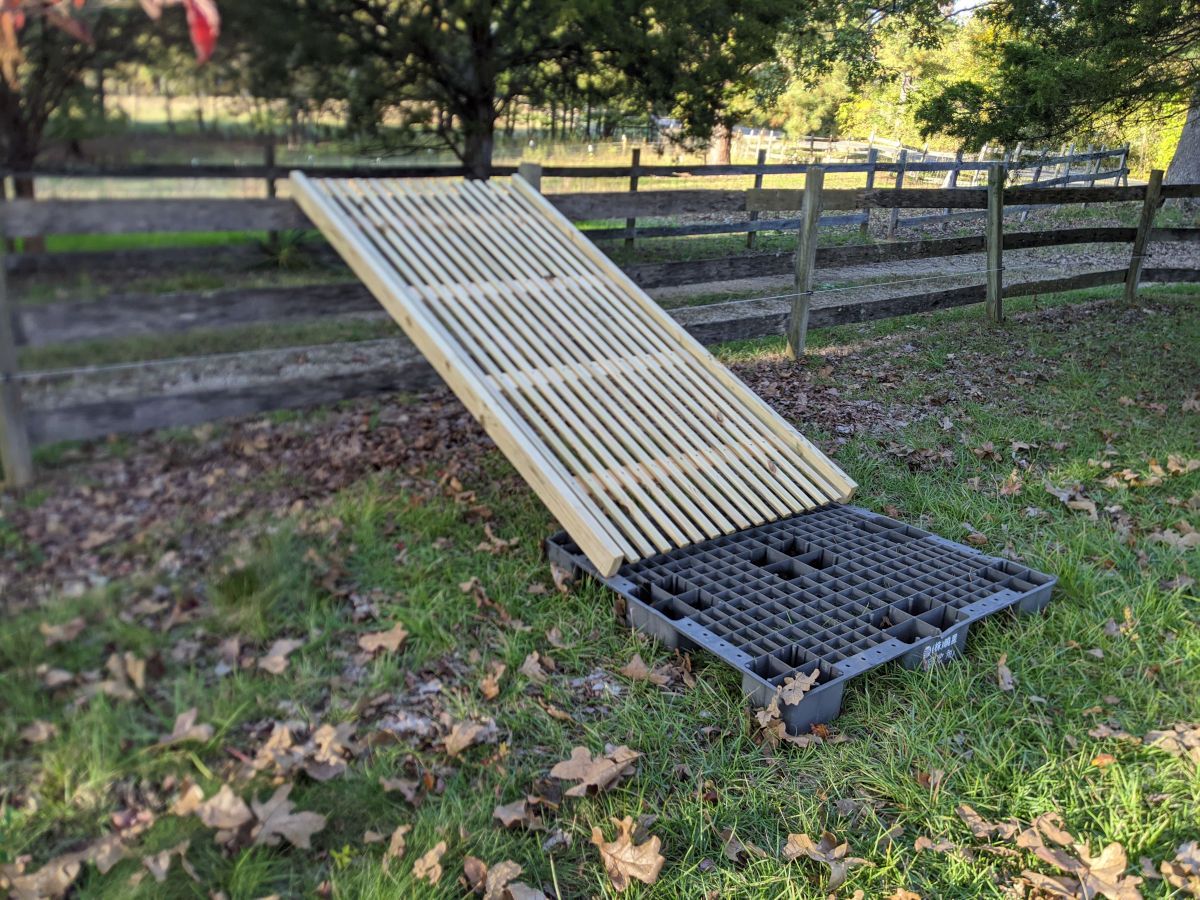
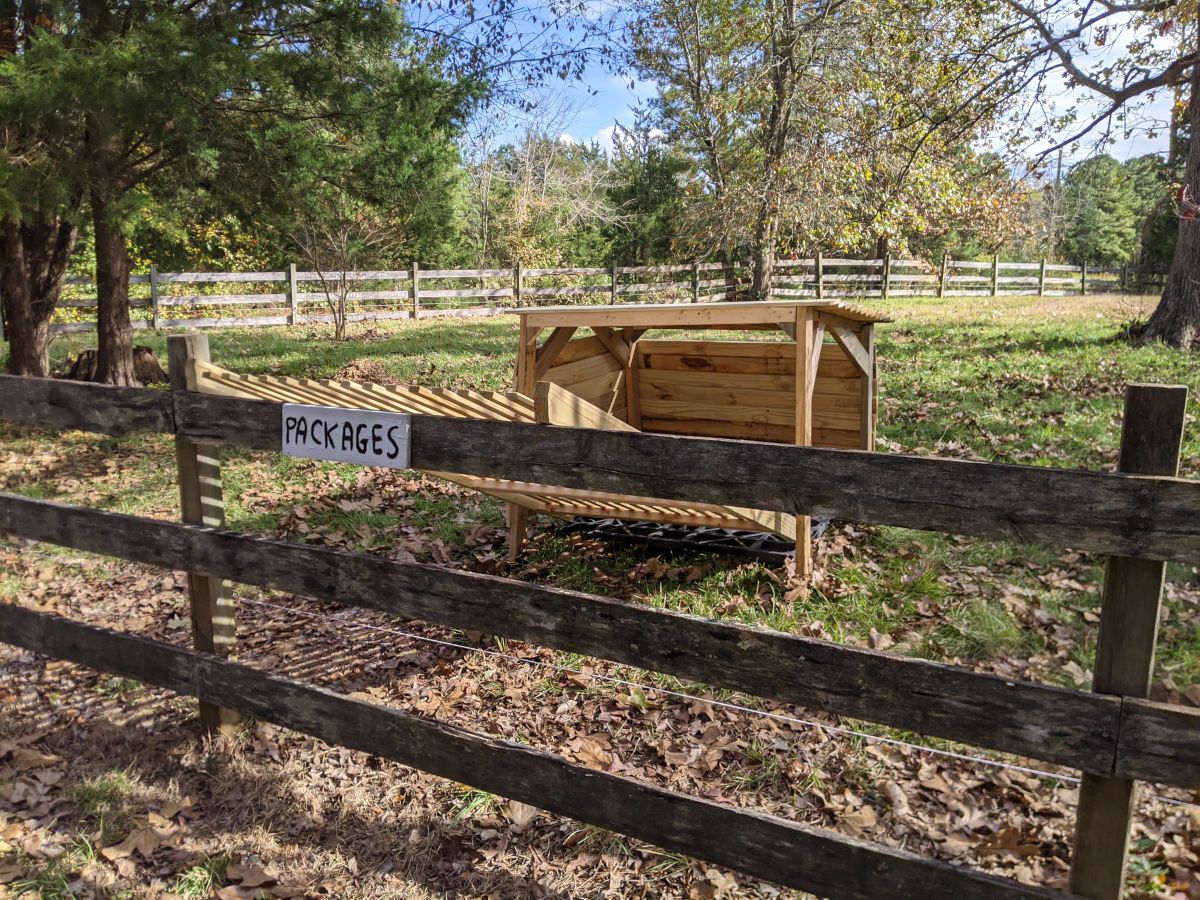
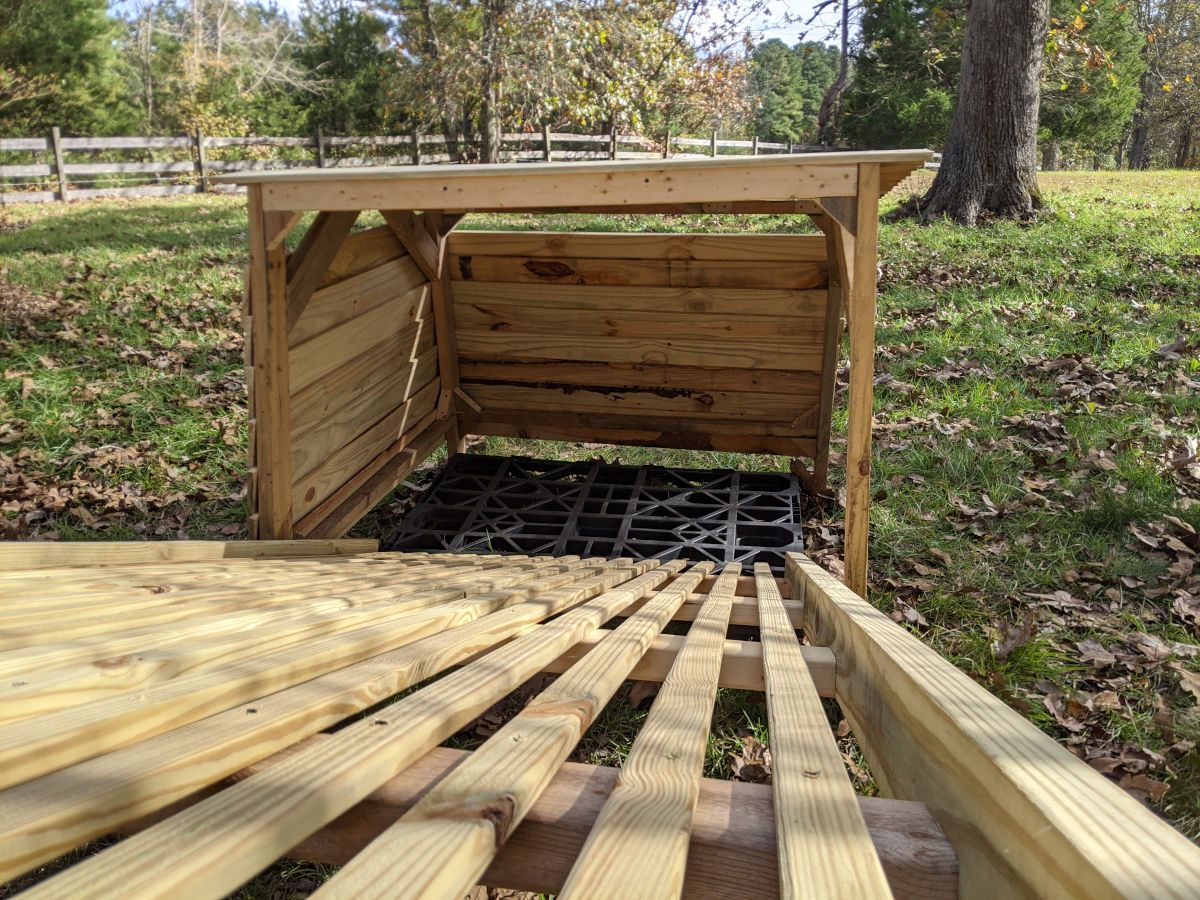
P.S. We added a package chute
After we wrote the original article, we ran to the local lumber supply store, collected materials to make this simple package chute for the USPS, UPS, FedEx, and other package delivery folks. Right now, the chute dumps onto a plastic pallet—$5 at my local hay and farm supply dealer—but we'll eventually replace that with an enclosed box. (Please excuse the blurriness to one side of some of the photos. My phone apparently has a smudged lens.)
In case you are curious:
- 15 one-by-twos (8ft) and 3 two-by-fours (8ft)
- 2 of the two-by-fours are cut into 4 pieces, each 44 inches, to serve as support beams.
Update 2020-11-02
The other day, we added a protective box around the landing pad. It will keep the bulk of the weather off of anything that drops onto the pad. It will also keep folks from seeing a tempting pile of packages. :)
Pretty cool, we think.
- Copyright © 2026 Tandem Farms
- Colophon